  I
A
New Beginning I
A
New Beginning
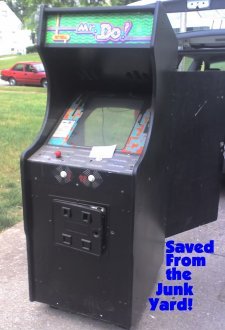
The time had come to try my first real arcade reconstruction. I found a
used
Qyx case from about 1985 that had been converted over to a
Mr.
Do cabinet at some time in it’s life. (Arcade operators knew they could
install a new motherboard and swap out the marquee for a fraction of the
cost of buying a new game when those quarters stopped rolling in.) It was
dusty, it was dirty…and it was MINE!
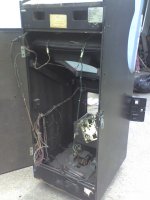
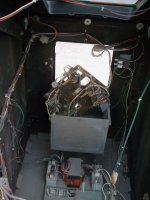
I dug in and blew the interior out with a shop vac, and then started pulling
out all the now useless junk. No picture tube, thank goodness! (The hardware
can STILL carry a charge that can fry you!)
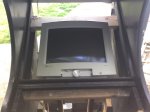 The easiest things were done first. I started by doing the support work
so I could install a nice 17” computer monitor. (The cases usually weren’t
built strong enough for a semi-modern PC monitor.) Some stout 2x4's
did the job. Next, replacing the old wasteful and hot bulbs on the
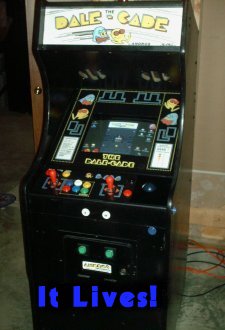
marquee with a nice cool fluorescent. My new marquee, above, was
done by editing artwork from the Internet with some custom type faces.
I try to find original artwork whenever I can, and often carefully add
to it so that the owner's name is worked in for those who want that.
It's an age old question when you approach a project like this...go specifically
for a pure restoration, or enjoy the vanity of making it your personal
arcade machine.
Controlling Personality
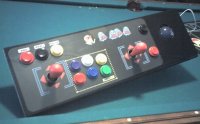  Next came the controls. I wanted two sticks for Battlezone and Robatron,
but space was tight, as it is everytime you try and make a four button/one
stick control panel into something that is supposed to boss around hundreds
of games!. For this case, I finally compromised by using a second stick
with only the mouse button to fire for a second player. In a pinch, you
could play a few dozen games two at once. I did have room for a full compliment
of six buttons for Player One, so Defender and Stargate were
go!
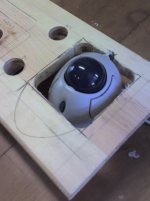
I knew I wanted a good trackball for the games that use it. I have about
four different brands of trackball mouse I use, and am always watching
Ebay for one of my favorites to go by. This blue ball was smaller but had
a great feel, very smooth operation; as you can see, it took some gymnastics
to mount it!! I spray painted a outline pattern in black on
the back of the control panel Plexiglas, and did some custom artwork to
show through it. It was only later that I found out that a LOT of
differnet more mundane arcade machines over the years were altered just
like this one...painted black and gimmicked to run that old wardog, Pacman!
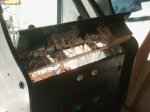 The
least expensive way to mate joysticks and buttons is to wire them through
a old-style keyboard, the kind with a ½” plug and real switches
inside. (Two of my later machines I actually had to fall back on a custom
made circuit board to do this, because those old keyboards are harder and
harder to find. I am always on the lookout for these "golden oldies!")
You can also wire a joystick to the guts of a regular gamepad, as shown
here. This case was especially fun to work with because it allowed me to
connect the controls to the keyboard without having to do any twisty reaching…the
panel flipped right up for easy access. This box was also made with
stereo speakers originally, so it was easy to junk the old ones and add
some powerful new ones. The
least expensive way to mate joysticks and buttons is to wire them through
a old-style keyboard, the kind with a ½” plug and real switches
inside. (Two of my later machines I actually had to fall back on a custom
made circuit board to do this, because those old keyboards are harder and
harder to find. I am always on the lookout for these "golden oldies!")
You can also wire a joystick to the guts of a regular gamepad, as shown
here. This case was especially fun to work with because it allowed me to
connect the controls to the keyboard without having to do any twisty reaching…the
panel flipped right up for easy access. This box was also made with
stereo speakers originally, so it was easy to junk the old ones and add
some powerful new ones.
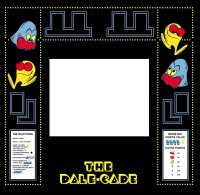 I
added custom artwork for the bezel, which is the thing that covers the
monitor casing up while letting the screen show through, and a PacMan-themed
wallpaper for the computer's desktop screen. With this machine, I started
using a screensnap of the original game for the desktop on all the Yestercades
I make. Gobble, gobble, little friend! PacMan rides again! I
added custom artwork for the bezel, which is the thing that covers the
monitor casing up while letting the screen show through, and a PacMan-themed
wallpaper for the computer's desktop screen. With this machine, I started
using a screensnap of the original game for the desktop on all the Yestercades
I make. Gobble, gobble, little friend! PacMan rides again!
 Click on PacMan to go back to the main Arcade!
The
Wizard..................
|


